Monday, August 23, 2010

Geek My Ride - Part 2: The Tools

Part of the reason for writing this series is because I'm a bit of a narcissist.   Okay, that's not true...part of it is I feel a need to give back to the community of folks who have provided me with so many of the tools I'll be using to do these projects.  The hardware platform I've chosen to work with is Open Sourced, and very well documented.  But, for someone new or returning to the hobby as I am, the docs can be a bit overwhelming.  By documenting my projects, progress and choices, I hope to provide some level of a repository for others following in my footsteps.

Or, I really am an narcissist.  :)

So, to start out, let's talk about the hardware.  As mentioned in my last post, it's Arduino.  Also as mentioned last post, I'm sure there are much better platforms out there to start dabbling in microcontrollers, but Arduino's got a nice, large following and a large repository of projects that are also well documented.  I'm looking to put things into production, not reinvent the wheel.  If I accidentally learn something along the way, so much the better. Since I did have a number of projects I wanted to put together, I decided to eschew purchasing a pre-made board and followed some instructions I found on building your own (warning, link is to a PDF, I couldn't find a link on the site). 

My thinking was that I'd put some extra money into putting together a dev board that could then be pulled off a bread board en masse and moved elsewhere.  In the end, I think this will be a bit cheaper for me as I'll only need to purchase chips going forward.  As I had most of the parts I needed, I just had to pick up some caps and the AtMega chips.  The end result:


Yeah, it's a bit unimpressive especially when you consider the only thing it does at the moment is blink the LED on  the left every second.  But, it's a start.  It's up and it's working.  Not bad for a first try!

As for other tools, there's a couple that will come in handy over the long haul.  The first, believe it or not, is Dropbox.  I will warn you, that link is a referral link.  If you click it and install Dropbox I get an extra 250M of free space.  But, you ALSO get an extra 250M, so it's win-win!  Dropbox is a great way to keep files in sync across multiple computers.  As I sometimes like to work on my projects during my lunch hour at work, it's convenient to have access to the Arduino programming environment there, too. But, I also need any libraries I might've installed, not to mention my sketches.  As the IDE amounts to a whopping 250M when unzipped, and self-contained within a directory, it's the perfect way to ensure my environment's the same at work and at home.  No more "but it works on my machine..."

I've etched PCBs in the past, but the reality is it's a messy, dangerous thing to do at home.  With a 2-year-old running around, I have no real interest in keeping those kinds of chemicals around, so I've decided that when I DO need a PCB etched, I'm going to have it done professionally.  I've already found a couple of places that look like they'll be cheap enough to use.  But, in order to create a PCB, I need a design and so I've settled on FreePCB to do them in.  Another Open Source solution, it helps keeps those costs low!  It doesn't do autorouting, but it can use a web-based autorouter for the task, and I'm fine with that.

That last piece in the puzzle is probably a bit of a surprise, but considering the nature of the projects it's an essential:

:

A lifetime ago, when I got my first car, the alternator went soon after I bought it.  I took it to a mechanic who told me it would cost $200 to replace.  I headed to my local Pep Boys and asked the parts guy how much a new one was.  "$35", I was told (this WAS a long time ago, I said).  "Are they easy to install?", I asked.  "Two bolts and a wire", he said, "go grab a Chilton's manual it'll tell you how to do it."  I was hooked.  Once I replaced that thing, I decided to try my hand at any and every car repair I needed going forward.  Some were spectacular successes.  Some required me to pay extra to the mechanic to de-screw it up afterward, but I learned something new each time.  For every car I've owned since, I've owned either a Chiltons or Haynes (I haven't actually seen a Chilton's in a while...).  As I'm going to need to be able to find electrical connections, having the wiring schematic for my car will be invaluable.  Or, in this case, at least worth $19.99!

That's it for the tools I'll be using for now.  I'd like to give props to our local electronics store, Goldcrest.  Only place in the city I cold find picofarad caps!  Next week, I'll talk about the first project which is already about 90% done.  I've got it wired and programmed, I just need the spiffy LCD I've ordered for it. What is it?  It's a surprise, of course!  But, I'll give you a hint: remember this is a car project, and I decided the first project should be one that helps me save enough money to pay for any remaining projects!




Thursday, August 19, 2010

Geek My Ride - Part 1: The Ride


I've recently moved into a new position that's more of a management-type role, and so don't have much action solving problems for which I can document solutions (although I was pleased to learn recently that one of my coworkers was having issues similar to the one documented in the article "
Resolving difficulties with using certs" and in searching for a solution he came up with mine!)  So, my mental energies being not so completely drained each day, I decided that I should probably give this whole "hobby" thing a try.  It's been a very long time since I've had the time or energy to try getting involved with a hobby, so for me it's a very new thing!

Being an IT/science/parenting geek, I settled on some criteria I figured I could use in deciding where to put my efforts.  First, it would have to be fun.  Obviously.  Secondly, I felt it should also be "productive" to some extent.  If I was going to devote time to a hobby, it meant time would have to come away from my chores and spending time with my family.  I felt that it should somehow contribute back to them in some way, even if it ended up being tangentially.  Third, it needed to be relatively inexpensive.  We don't have a lot of disposable income, so by definition I couldn't dispose of a lot of income on it.  Fourth, it needed to be something that I could use to engage my daughter in eventually and get her interested in some kind of sciencey/techie things. 

I finally decided that something that I'd wanted to do for a LOOONG time was dabble in electronics.  How long?  Well, when I was five years old, I took apart a radio that belonged to my mother.  I carefully pulled each component off of the circuit board inside and meticulously laid each one out on a retaining wall in our back yard.  I've always been fascinated by the field, and have a collection of electronics hobbyist magazines I've gathered over the years.  And, depending on how much I did, it could be done relatively inexpensively. 

I knew, also, that I wanted to get into playing around with microcontrollers.  Electronics are fun, but electronics you can build and then program gives you two bangs for your buck!  Having followed its development for a while, as well as seeing a significant number of projects out there to whet my appetite with, I knew I'd be going with the Arduino platform.  It's relatively inexpensive, has a wealth of information available from the community and is easy to build on.  Is it the best microcontroller platform?  Probably not, but it would give me a number of quick and easy successes early on to help keep my interest.

But, what kinds of projects to start with?  It's easy to say "I want to build projects using a microcontroller", it's another to actually decide on which ones to do.  Fortunately, the decision was made for me.  My old daily driver beater, a 1989 Buick LeSabre that was originally my wife's (I ended up using it as I have a long drive to the office and it got GREAT gas mileage), died.  It was a good car, but in the last year it had really (and literally) started to fall apart around me.  Since we couldn't get by on a single vehicle, we went into a mad press to find a replacement. 

We found a couple of options, and the one we settled on was this spiffy silver 2001 Chevy Impala. It's a bit of an old man's car, but sporty enough to not be totally embarrassing to be seen in.  It's roomy and comfortable to drive, and actually gets reasonable miles per gallon.  This was important...if I really kept myself to a reasonable speed, the Buick typically got 30-32 MPG.  Obviously any significant drop in mileage would end up making it a costly investment.  But, I've been checking it at each fill, and have been averaging between 27-29 MPG (I do mostly highway driving), so no real complaints.  Also, that's been with A/C which the Buick didn't have (another serious plus for this car!)


I've always been a car guy.  In the past, it was all about muscle cars and performance, but I've come to appreciate the bells and whistles that come with more modern rides.  Now being a father, the idea of extreme performance has become anathema to me (and, really, you're limited to at most 65 MPH anyway.  What does all that performance buy you?)  So, that settled it, I was going to use my new car for the base of my electronics projects.  There's a few that I've had rolling around in my head for a few years, but I never had a car worth putting that kind of effort into.  Since I spend over an hour a day in my car, it made sense to put the effort into making the car more comfortable and user-friendly. 

With all of the above in mind, I've settled on a framework on which to design my projects around....When my wife and I were in Las Vegas to get married a couple of years back, we were fortunate in that the rental car place ran out of sedans of the type we'd registered for.  We thus had to settle on getting around town in a fresh-off-the-truck, only 500 miles on it, brand new Infinity G35.  Man, that was a nice car!  At one point, while climbing out of it I noticed the Nissan emblem on the door jam.  I realized that the body of the car was almost exactly the same shape as an Altima, and it finally made sense to me: a 2010 Infinity is nothing more than a 2015 Nissan! 

The Infinity owners pay through the nose for the privilege of "beta testing" all of the new features that will eventually be old news and put in as standard on the "lower quality" cars.  Big dummies.   But, as long as the luxury features work, they get some really nice perks: touch screen navigation and vehicle control, high performance, low fuel consumption engines, quiet, comfortable rides, etc, etc...In thinking about some of the features I liked in that Infinity, I decided that what I was going to do was build a low-cost luxury car using the Impala as a basis. 

So, that's what this series of articles will be about: the journey of my car from family sedan to home-brew luxury beast.  And, since these modifications revolve around an Arduino-based control system, the next article will be about my first steps in using that platform...


Thursday, April 22, 2010

Maximizing storage in the cloud

It's been a while since I've written something for this blog.  That's primarily because of a change in jobs.  My old job was as a Windows Server Engineer.  I fixed stuff, so I encountered weird problems from time to time and liked sharing that info.  The new position is as Situational Lead.  My company has adopted ITIL protocols and my new job concerns incident management.  In a nutshell, when there's a big outage, it's my job to gather the team together who will get it fixed and manage the incident until service is restored.  I don't fix much anymore.
   
So, that means I won't be talking as much about technical stuff, I have other ideas in mind.  But, for now, I wanted to talk a little bit about some services that have been around for some time now that I'm just getting around to exploring: cloud storage. Like a lot of people these days, I've got a USB flash drive I carry everywhere.  Actually, I've got two: a 4G one and a 1Gigger.  Sometimes it's very useful to get files back and forth to the office, and it's a whole lot easier carrying a USB stick than taking my whole laptop home with me.  The big problem, though, is making sure the files you need on there actually ARE on there.  Recently, my company has implemented desktop drive encryption, with it being forced for removable drives.  If I want to copy from my computer to the USB drive, it has to be encrypted (there's no such restriction for USB -> Computer transfers). 

Recently, my friends and I have started up a PBeM game of Trail of Cthulhu.  For a while, I had been storing the rule books, which are in digital format, in my e-mail, but it started to become cumbersome with the number of files I had to maintain, plus notes files, etc.  It was looking like a flash drive was the way to go when I remembered about companies like Dropbox, iDriveSync and Box.net.  For a reasonable monthly fee, these companies will give you fairly large amounts of storage space that you can use however you want.  For free, the first two give you 2G and Box.net gives you one.  2G is a nice chunk of space, so I decided to sign up for Dropbox and see if I might get some use out of it.

That was last Friday.  Since then I've used the hell out of these things!  Firstly, the first two offer extensions you can install on your computer that will match an ordinary folder on your computer with the online storage.  This means managing files is as easy as it already is in Explorer.  Drag files into the special folder, they're automatically synced with your storage.  If you've got the client installed on multiple machines, all of them are synced simultaneously.  Now, if I need to get a file to the office, I just drop it into my Dropbox folder at home and it'll be on my office PC before I get there.

But, the real beauty of these services lies beyond their ability to assist you in moving files.  They're a great way of getting large files to other people. I had a digital copy of a video a friend of mine wanted to see, but it was way too big to send via e-mail.  No problem, I copied it into to my Dropbox folder.  I right-clicked the file in Explorer and selected "Copy Public URL".  This placed in my clipboard a URL I could send my friend who could then just click the link and download the file.  No fuss, no muss, no setting things up.  And, since the file was downloading from Dropbox' servers, it was fast!  A whole lot faster than if I'd tried to setup an FTP site on my home computer or something.

You get all of that, plus you can access those files yourself at any time, from any computer, by just logging into the website.  Keep a copy of an anti-virus program you like to have available for when you go to a friend's house, but forgot your USB drive?  No problem.  I really have gotten a lot of use out of these services in just the last week alone, and highly recommend them to anyone who works with files in multiple locations.  A few tips, though:

 - Dropbox has a referral program.  If you click the link in the preceding sentence, you'll be able to sign up for the service using me as a referral.  Doing so means you and I will each get an extra 250M of storage space.  It's not much, but you can go up to a full 8G of free additional space if you get enough referrals.  That's not too shabby!

 - I'm not a fan of having personal stuff on my work computer.  That's not to say I don't, just that I don't like it.  At any time, my computer could get audited, and I don't think I'd get a lot of crap for having Trail of Cthulhu rulebooks on it, but why take that chance?  What I did was installed Truecrypt.  I then created a 2G volume and pointed Dropbox at that.  Now, whatever is in my Dropbox is encrypted when on my work PC.  This has the added benefit in that when mounted, the volume shows up as a drive.  All I have to do is look at how much free space is available on that drive and I know instantly how much free space I have in Dropbox.  Of course, I now have a couple of referrals, so I'll have to create a new volume to match the size.

 - Within my Dropbox, I've got a folder called "Move Off".  I have a script that runs once an hour on my machine at home that monitors that folder.  If something shows up in it, it's moved off into another location.  I use my Dropbox for non-private, but still personal data.  If, for example, I want to get the pictures off my iPhone while in the office, I can do so.  I just put them into Move Off and they're whisked away soon after. 

These companies provide a great service to you and I and I highly recommend checking them out.  I'm even considering paying for one of them, once I've decided who gives most consistently high level of availability!  Oh, and did I mention that some have iPhone apps that allow you to view and manage your files on the road, too?


Friday, January 8, 2010

Resolving difficulties with using certs

Recently, my company has begun working on integrating the various services and products we offer.  Since most of our customers purchase or use multiple services, it only makes sense that the data they have in one should be available in all (I know, sometimes the obvious takes a while).  To do this, we're using .Net web services to allow this to happen.  In order to protect these services, we're using code signing certificates and access gateways that verify these certs.


A problem we've run into is that most of our internal users in these environments connect via Citrix Xenapp servers.  In order to limit the management of certs in this environment, the code signing certs are added to the local machine, rather than individual, stores.  This allows any user of these machines to connect to the services without our having to make sure the certs are installed in everyone's profiles, etc.  We had a release that was going live today that served as integration between two services, but found they couldn't talk to each other.  It turns out that access to certs was the issue.


When installing these certs, we simply installed them by double-clicking them and following the import wizard. We'd tell the wizard to install them into the local machine store and then used the winhttpcertcfg utility that comes with Windows to grant only specific groups access to these certs.  When put into place, though, on our test systems we found that no users could use the service.  When we checked permissions on these certs, the users definitely had been granted access to them, but it just wasn't working.


When we had users log into machines that had the cert and asked them to run the command:


winhttpcertcfg -l -c LOCAL_MACHINE\TrustedPeople -s certname


They would get the following error:


Error: Access was not successfully obtained for the private key. This

can only be done by the user who installed the certificate.


When an admin, namely myself, ran the same command we'd see that the users had been explicitly granted access.  This made no sense whatsoever, and in googling the error I found I wasn't alone in my confusion.  During this search, I came across a utility that's put out by Microsoft called the FindPrivateKey tool.  After using this spiffy little tool, I found that the cert was actually installed in MY profile.  It was showing as part of the local machine store, but was in C:\Documents & Settings\me\Application Data\Microsoft\Crypto\RSA.  It was actually supposed to reside in C:\Documents & Settings\All Users\Application Data\Microsoft\Crypto\RSA.  Well, that would explain why it worked fine for me, now we just needed to find out why it was going there.


When fighting with a problem, I often find it's easiest when I've hit a roadblock to try and rethink the issue.  Importing the cert via the wizard wasn't generating any errors, but it also wasn't putting it into the right place.  All of the tools were giving me error messages or information that lead to dead ends.  On a whim, I decided to change my first step and instead of running the wizard by double-click it, I'd trying importing the cert directly into the Certificates MMC.  Now, a quick word of instruction: you can't just do Start -> Run -> certmgr.msc as this will just take you to your personal store.  You have to launch MMC, add the Certificates snapin and choose Computer Account, Local Machine in order to get to the store you want.


When I did the import this way, I got a completely different error:


An internal error occurred. This can be either the user profile is not accessible or the private key that you are importing might require a cryptographic service provider that is not installed on your system.


Aha!  I love different errors, especially when they lead me to the solution.  So, after reading this article, I checked out the permissions on the RSA folder in All Users and sure enough they were different.  Oddly enough, they seemed less restrictive than what's listed in the article, but I decided to set them as written to test.  And, it worked!  When I installed a cert this time, it went into All Users.  If I ran the winhttpcertcfg command above, it would show that the users listed in the article were the ones who had access to the cert.  In other words, all winhttpcertcfg really appears to do is set NTFS permissions on files.  Ah, obscurity!


Okay, solution's now in hand, the day's halfway over, release is tonight and I have 75 servers that all need to have their configuration updated...whatever does one do?  You break out the time honored skill of writing batch files, of course!  I compiled all of the files I would need to make this work right into a folder.  When running scripts across multiple servers, consistency is key.  In this environment, I've striven for as much as I can, but these some servers are cycled on an annual basis as we retire old hardware.  Consistency's an ideal, but not implemented perfectly.  Compiling what I need and pushing it out to each server as part of the process really ensures it'll work. 


The first batch file, setupfixes.cmd:


Mkdir \\%1\l$\certs
copy *.* \\%1\l$\certs\
psexec \\%1 L:\certs\permfixes.cmd

rd /s /q \\%1\l$\certs


I run this by issuing a for loop:


for /f %x in (serverlist.txt) do setupfixes.cmd %x


serverlist.txt contains simply a list of servers, one per line.  As the loop iterates through, it simply replaces %x with the server name.   This batch creates a new folder on the remote machine, copies all of the necessary files into it, runs a second batch using psexec from Sysinternals and then deletes the folder and all files since it contains our certs that we want to restrict access to.  The second batch, permfixes.cmd:


cscript //h:cscript

L:\certs\xcacls.vbs "T:\Documents and Settings\All Users\Application Data\Microsoft\Crypto\RSA" /G everyone:;E1234589B /G Administrators:F /G SYSTEM:F /T /S  /I Remove /SPEC B

winhttpcertcfg -g -i L:\certs\cert.pfx -c LOCAL_MACHINE\TrustedPeople -a Administrators -p password

winhttpcertcfg -g -c LOCAL_MACHINE\TrustedPeople -s cert -a "domain\client users"

winhttpcertcfg -r -c LOCAL_MACHINE\TrustedPeople -s cert -a everyone

winhttpcertcfg -g -c LOCAL_MACHINE\TrustedPeople -s cert -a Administrator

winhttpcertcfg -r -c LOCAL_MACHINE\TrustedPeople -s cert -a Administrators


I'm using xcacls.vbs because the permissions from the article are more granular than what can be set by cacls.  Again, our build process specifies we set the scripting host to cscript, but that doesn't guarantee everyone's done that.  Easy enough to ensure in advance, though.  I set the permissions on the RSA folder to match what MS says is the default.  I'm honestly not all that happy about these are they're fairly open, but I needed to get this out to production.  I push these perm changes down the tree and tell it to remove inheriting permissions from higher levels.  Finally, we import the cert, grant access to the users we want to have it, remove admins and everyone, and add the local admin. 


Why remove admins, but add the administrator?  We want to restrict access to this cert to a limited set of users.  Admins like me shouldn't be able to use it as it would give them escalated privliges in the environment.  But, we might need to do something with it at a later date, so we leave a back door.  Since login as local admins is an audited event, we'll be notified of any potential security breach.


I've tried to include as much detail in this solution as possible because I had a hard time finding it myself.  My hope is that when someone googles either "Error: Access was not successfully obtained for the private key. This can only be done by the user who installed the certificate" or "An internal error occurred. This can be either the user profile is not accessible or the private key that you are importing might require a cryptographic service provider that is not installed on your system." they'll come here and be able to fix their issues.  I've put the errors in twice to make sure it gets indexed well. :)


Friday, January 1, 2010

My first iPhone Webapp

At work, I am a serious scripter.  I try to use VBscripts for almost every repetitive task I do for the simple reason that I make mistakes, computers don't.  If I have to edit the properties for 200+ Citrix-published applications (a task I've had to do numerous times), the chances of my breaking things is much greater than if I just get it scripted and tested once and let the script do the heavy lifting. 


But, VBscripts just haven't been cutting the mustard for some of the more onerous tasks in recent months, and so I took advantage of the fact that Microsoft offers Express editions of Visual Studio 2008 as free downloads.   (Recently, my company got everyone in my group MSDN subscriptions, so I was able to get VS2008 Pro to use!)  I had been wanting to get more familiar with Visual Studio and app development in general as I had a couple of things I wanted to try doing.  Figuring the best way to learn was to find a project I wanted to do and dive it, I thought about it for a while until I came up with...


For years my home has been controlled via a home automation system called HomeSeer.  HomeSeer's a great product, put out by a company that stands firmly behind their products, with a great user community that's always ready to help.  One of the pieces of HomeSeer I've played around with over the years is its scriptability.  It has its own .Net-based webserver built in and will run fairly standard ASPX pages as well as VBscripts.  By just adding some references into your project, you can also control it via other languages as well.


And then, of course, there's my ubiquitous iPhone.  Last year I decided to give iPhone development a try and so got a cheap Mac, downloaded the SDK and gave it a shot...and realized after looking at the docs for about 10 minutes that Objective-C is not an easy transition for a VB guy to make.  So, I put it on the sidelines for a while.  Recently, though, I came across iUI.  This is a framework put together by the founder of Facebook that allows developers to very easily create iPhone-based Webapps.  Since it's agnostic to the underlying development framework, I had found my project: I would create my own iPhone interface to HomeSeer.


I see that others have done this, but I had some specific needs I wanted to accommodate.  And, I wanted to learn.  Creating this from scratch would give me a lot of experience with so many different areas, it was too good to pass up.  And, so, I give you....


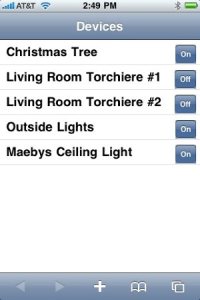
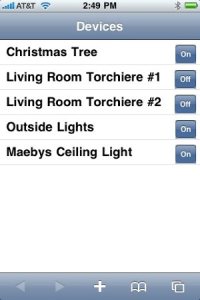
Looks pretty cool, right?  It doesn't actually do anything yet, but it's got a lot of stuff going on behind it.  First, it connects to HomeSeer and enumerates all of the devices and gets their status.  Then, it generates this nifty page with a button that's named the opposite of the device's status.  Eventually, the plan is that you'll be able to tap one of those buttons and turn lights off and on.  But, since HomeSeer is very extensible and can be used to control almost anything, so too will this app be able to do a whole lot more. 


Not too bad for an hour's worth of fiddling.  In coming installments, I'll document what I did to get everything setup and in place to make the magic happen because a lot was either poorly documented or the documentation was spread over multiple locations. 


Friday, December 18, 2009

Diagnosing side by side errors on x64 Windows 2008 R2

We all have software that we can't do without.  These packages are always the first ones installed when building a new machine or rebuilding an old one.  At the office, I have two computers and three monitors.  Gaze upon the awesomeness that is my setup:


In such a situation, the most common way to work is to use a hardware KVM switch, but not plug in the monitors.  This isn't ideal to me as I like being able to move through the screens a bit easier.  I also have the need from time to time to cut and paste between the two systems, and a KVM doesn't give me that option.  Historically, I'd used an open source package called Synergy.  This is a software "KM" switch that allows one mouse and keyboard to control two computers.  You simply move the mouse between the two screens and it works very slick.  Unfortunately, the original project hasn't been updated in quite some time and hasn't kept up with modern OSes.  One issue I had for a while was one of my machines was 64-bit, and Synergy doesn't support it very well.  Fortunately, there is a fork called Synergy+.  The current version primarily is released as a bugfix package to eliminate some of the worst issues with the old fork, as well as get it working on modern OSes. 

I recently migrated the machine on the right from Windows 2003 Server to Windows 2008 Server R2, 64-bit Edition.  Since Synergy+ actually had a 64-bit build, I figured I'd give it a shot.  My left machine already runs Windows 2008, 64-Bit Edition and Synergy+ works just fine.  Unfortunately, it did not on my new build.  For those who know, 2008 R2 is not just the latest release of 2008.  It's essentially a whole new OS, akin to Windows 7.  We have run into a couple of packages that simply won't work with the R2 release because of this, and I thought Synergy+ was one of them. 

On launching the configurator, I'd get an error "The application has failed to start because its side-by-side configuration is incorrect".  A quick Google of this error lead to some good information on what causes it, and how to fix it.   The Wikipedia article on SxS gives a good overview of how Side by Side works.  The issue that generates the error message I was looking to resolve then is due to the manifest for the Synergy + executable being wrong or pointing to the wrong location.  So, now all I had to do was find out what it was pointing to and I should be able to resolve it. 

The OS provides a tool called sxstrace.exe for diagnosing these kinds of issues.  First, we run it in trace mode and have it capture SxS information:

sxstrace trace -logfile:trace.log

Then, launch the offending executable, in this case Synergs.exe.  This produces a binary log file that we have to translate into a text file so we can read it.

sxstrace parse -logfile:trace.log -outfile:trace.txt

The highlighted line below shows what we're missing.  It's the VC 9 runtime redistributable.


=================
Begin Activation Context Generation.
Input Parameter:
    Flags = 0
    ProcessorArchitecture = AMD64
    CultureFallBacks = en-US;en
    ManifestPath = C:\Program Files (x86)\Synergy+\bin\launcher.exe
    AssemblyDirectory = C:\Program Files (x86)\Synergy+\bin\
    Application Config File =
-----------------
INFO: Parsing Manifest File C:\Program Files (x86)\Synergy+\bin\launcher.exe.
    INFO: Manifest Definition Identity is (null).
    INFO: Reference: Microsoft.VC90.CRT,processorArchitecture="amd64",publicKeyToken="1fc8b3b9a1e18e3b",type="win32",version="9.0.21022.8"
INFO: Resolving reference Microsoft.VC90.CRT,processorArchitecture="amd64",publicKeyToken="1fc8b3b9a1e18e3b",type="win32",version="9.0.21022.8".
    INFO: Resolving reference for ProcessorArchitecture amd64.
        INFO: Resolving reference for culture Neutral.
            INFO: Applying Binding Policy.
                INFO: No publisher policy found.
                INFO: No binding policy redirect found.
            INFO: Begin assembly probing.
                INFO: Did not find the assembly in WinSxS.
                INFO: Attempt to probe manifest at C:\Windows\assembly\GAC_64\Microsoft.VC90.CRT\9.0.21022.8__1fc8b3b9a1e18e3b\Microsoft.VC90.CRT.DLL.
                INFO: Attempt to probe manifest at C:\Program Files (x86)\Synergy+\bin\Microsoft.VC90.CRT.DLL.
                INFO: Attempt to probe manifest at C:\Program Files (x86)\Synergy+\bin\Microsoft.VC90.CRT.MANIFEST.
                INFO: Attempt to probe manifest at C:\Program Files (x86)\Synergy+\bin\Microsoft.VC90.CRT\Microsoft.VC90.CRT.DLL.
                INFO: Attempt to probe manifest at C:\Program Files (x86)\Synergy+\bin\Microsoft.VC90.CRT\Microsoft.VC90.CRT.MANIFEST.
                INFO: Did not find manifest for culture Neutral.
            INFO: End assembly probing.
    ERROR: Cannot resolve reference Microsoft.VC90.CRT,processorArchitecture="amd64",publicKeyToken="1fc8b3b9a1e18e3b",type="win32",version="9.0.21022.8".
ERROR: Activation Context generation failed.
End Activation Context Generation.


At this point, all I had left to do was to simply head over to Microsoft's site and download the SP1 version of the 64-bit redistributable and Synergy+ launched right up.  A quick solution to a simple problem. 

Sunday, November 15, 2009

It's all a series of tubes, Part 3: I'll bet you think this Pipe is about you

In Part 1 of this series, I discussed how I was looking to simplify managing my social networking content, both incoming and outgoing.  I talked about how Ping.fm made updating statuses for multiple sites as easy as it had been for just one.  In Part 2, I talked about using Yahoo Pipes as a way to aggregate incoming RSS streams from my Twitter follows into one feed that I could then enter into a feed reader.  This part is all about my favorite subject: ME!  I'm going to create what I've been calling a "vanity feed". 


As mentioned in Part 1, I write quite a bit of material that ends up on the Interwebs.  Every time I write something new, I will generally post a link in Facebook so my friends and family can bask in my brilliance.  I also want it posted to places like Linked In so my professional contacts can be amazed with my talents as well.  What?  It's called a vanity feed for a reason!  :)  A problem I have, though, is that Facebook only allows you to subscribe to one RSS feed.  Also, with to respect to my fellow Tuners, while I want all of my posts from iPhoneTunes.net to show up I don't want anything else.  So, let's get started.


As before, we're going to start with a Fetch Feed source.   But, I don't want the whole iPhoneTunes.net feed, so we're going to need to filter that.   Expand Operators and looky there...a Filter tool!   Just like most other tasks in Pipes, this tool is fairly straightforward to use.  The site owner of iPhoneTunes.net always puts our names at the top of any reviews we do.  So, if I click the Fetch Feed tool, I see the whole feed in the debugger.  But, if I pipe the output of the Fetch Feed into the Filter, which I've told to permit only those items that have my name, we see the only thing to come out of this Pipe is my latest review.  One feed down, and this whole process took less than two minutes to do.  Not too shabby, right?


Now we turn to the other feeds.  Those area a bit more straightforward as I really just want the output from them.  So, add another Feed Fetch source and enter the URLs to the other two feeds into it.  But, now we have two sources and if you look at the Pipe Output tool, you'll see it's only got one input!  Fortunately, there's an easy solution: the Union tool.   This simple tool provides multiple inputs and a single output.  If we attach it to the Pipe Output and then highlight that, we see we've got my one iPhoneTunes.net entry and all of the entries from this blog.  It pulled all of them, so you can't see the TEDxRochester blog items in the debugger, but they're there.


But, this does present an issue.  See, aside from the posts in this "Series of tubes" series, I've already posted all of the above items to the places I want to feed with this mashup.  If I publish this feed, it's going to repost everything I've already posted and annoy a lot of people.  That's not a good thing!  I'm trying to show my tech skills and I go and do a multi-post.  What I need to do is filter even further and only take out anything that was posted prior to today (11/15/2009).  In theory, once I'm done, the only things that should be in my debugger window should be these three blog posts.  So, let's add another filter box:


As you can see, we need another special tool, the Date Builder.  I honestly don't know why I can't just type a date into that filter field, but that's the way Pipes does it.  The output from this source doesn't go into the input of another tool, it goes to a data connection.  In the picture above, it's not clear, but this field is connected to the little dot to the right of the rule in the bottom filter.  And, that's it.  For the heck of it I add a Sort operator so that multiple items posted in one day will show up in the order posted, but that's it.  The only output I get are the two blog entries for today...three as soon as I publish this one.  Going forward, if I post a new review, update for next year's TEDxRochester or just want to share some knowledge here, it'll go to all of my social networking sites without my having to do a thing.


Knowledge management is always easiest when you don't actually have to do anything. :)